2FA forwarding is required if you're providing us with your user for certain gateways and processors.
There are several ways you can setup 2FA forwarding.
Method 1: Gmail Filters and Forwarding
-
Log in to Gmail
-
Access Settings: Click on the gear icon in the top right corner and select "See all settings."
-
Filters and Blocked Addresses: Go to the "Filters and Blocked Addresses" tab.
-
Create a New Filter: Click on "Create a new filter." In the subject field, enter the subject line used in 2 factor authentication emails
-
Define Filter Criteria: If desired, add additional criteria for the filter (e.g., 2FA sender's email address). Click "Create filter."
-
Forward It: Check the box for "Forward it to" and select or add the hello@disputifier.com
-
Click "Create filter."
That's it! You're done.
Method 2: Zapier forwarding
Zapier forwarding can be used for non-Gmail accounts using a slightly different setup process.
-
Log in to Zapier
-
Create a new Zap
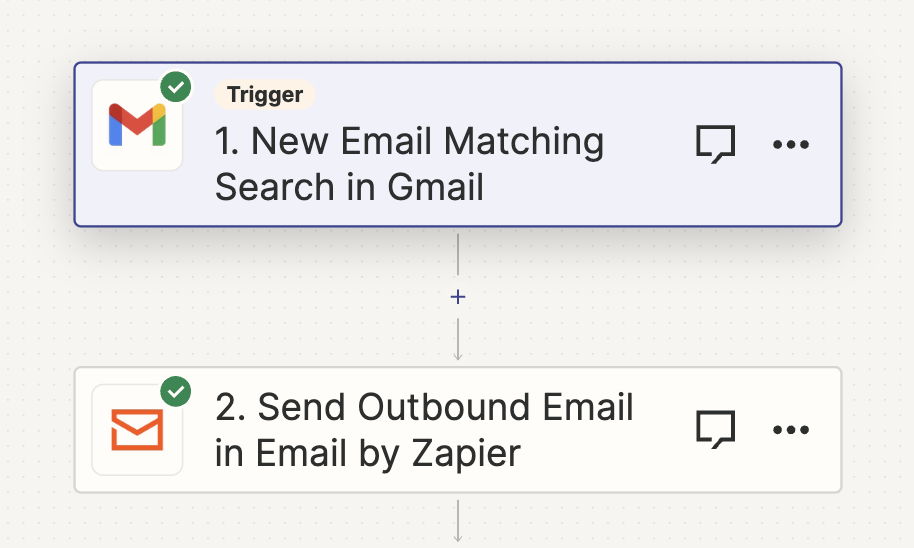
- Select Gmail and click the "New Email Matching Search in Gmail" trigger. Connect the relevant email account.
- Enter the subject line used in 2 factor authentication emails under "Search String"
- Click continue and test the trigger.
- Add a new step. Select "Send outbound email in email by zapier"
- Under "To" enter hello@disputifier.com
- Under "Body" select the "Body Plain" dynamic text insert
- Click continue and save the zap.
That's it! You're done.